Getty Images/iStockphoto
Learn how to use VMware's Workstation clone VM feature
You can create linked and full clones with VMware Workstation's new VM clone wizard, but you should first understand their use cases and how to create either clone with the wizard.

Advances in virtualization have made it simple to create copies of a machine. Because VMs are comprised of files, if you copy those files with virtualization, you create an exact duplicate of that VM. But copying VM files manually comes with its own challenges, such as network conflicts. The VMware Workstation clone VM wizard can eliminate these conflicts with linked or full clone technology. You should first understand their differences, use cases and how to deploy them to avoid any problems.
There are many reasons to clone a VM. If you build a base VM with Windows or Linux once and plan to reuse it, you can copy it into a new VM for a future project. Or if you plan to test a certain setup, you can copy the original VM and it remains intact and functional. With a VM snapshot, the original state and new state can't run simultaneously, but a VM clone can.
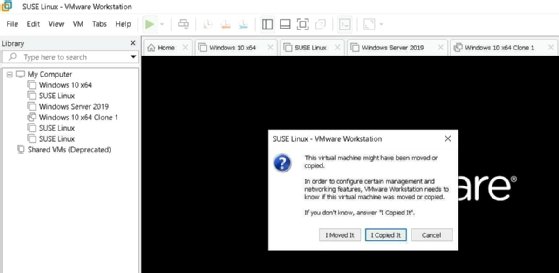
VMs are essentially files within a file system. In theory, if you copy a VM folder you then have a VM clone. The issue is it's an exact copy, which means the VM's Universal Unique Identifier (UUID) and MAC address would be identical. This can cause problems on your network when you run the original and source VM simultaneously. In Figure 1, when you power on the VM copy, the system asks whether you've moved or copied the original VM.
In this case, you should select the I Copied It option because it creates a new UUID and MAC address. But if you select the I Moved It option, it creates an identical UUID and MAC address, which can potentially cause conflicts on the network, unless you move the VM files rather than copy them.
To prevent network conflicts, it's better to use Workstation's VM cloning wizard instead of copying data manually. The clone VM wizard not only creates full VM clones but also linked clones.
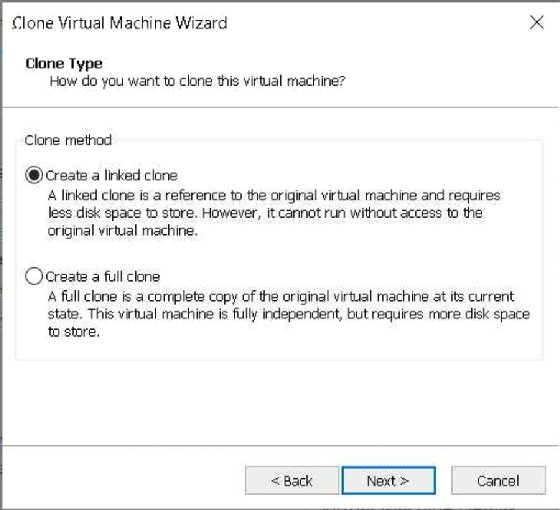
Full clones vs. linked clones
A full clone is an exact copy of a VM; the system duplicates the full data -- or hard disk -- of the VM and creates two identical and independent VMs. The cloned VM has no relation to the source VM. Still, the clone consumes the same amount of storage as the source.
VM clone creation also takes some time because the system must copy all data from the source VM. A more efficient method is to use linked clones depending on your needs. The linked clone process creates a new VM with a delta disk and places changes only related to the source VM.
Not only does this create linked clones in a matter of seconds, it also isn't necessary to copy all data from the source VM. Workstation can create multiple linked clones from the same source because the software creates a snapshot of the source, leaving it intact and unchanged for future use.
Still, linked clones can have a negative effect on the source VM's disk performance because the source VM runs alongside its snapshot, which spawns the linked clone.
To choose between full clones or linked clones, it depends what your workload requires. If you require a more permanent copy of a VM that must run independently, then a full clone is the best choice. When you require a VM to run a few tests and then plan to delete that VM afterward, a linked clone is a better choice.
Linked clones also have a direct dependency with the source VM. A warming message appears if you delete the source VM. In Figure 1, the warning message notifies you that deletion of the source VM also removes the linked clone.
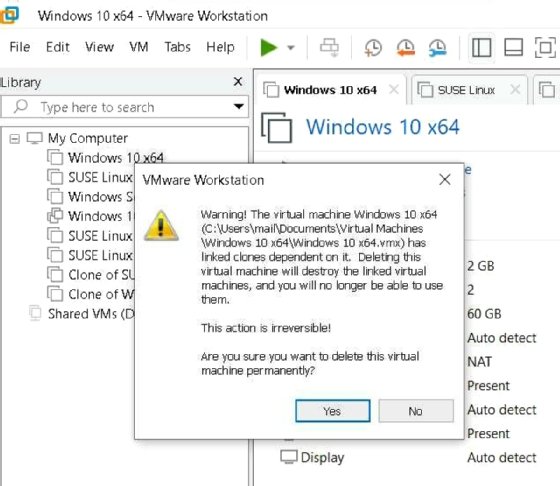
You can then decide whether that's the path you plan to take. Understand that if you delete the source VM files from the file system outside of Workstation, this makes the linked clone unusable.
How to clone a VM with the VMware Workstation clone VM wizard
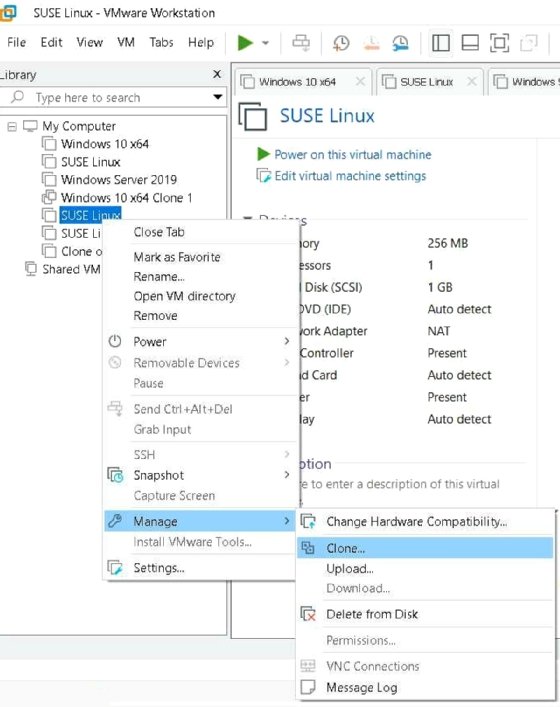
To clone a VM with the Workstation clone VM wizard, select the VM from Workstation's inventory and click the Manage option from the drop-down menu. Then, select the Clone option.
The next step is to choose the start point for the clone. In Figure 4, you can see a source VM without a current snapshot.
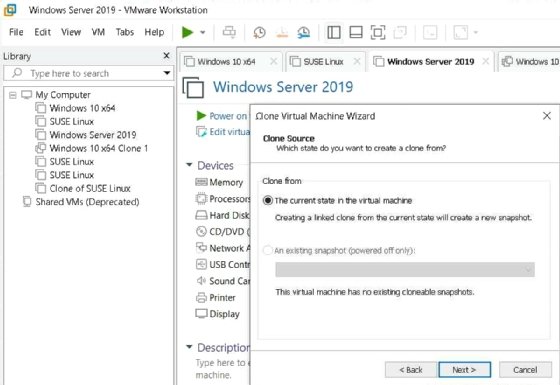
In this case, Workstation bases the clone on the source VM's current state and disk content – the option An existing snapshot is grayed out. When a snapshot exists, you can choose it to form the base state of the cloned VM. Next you must decide whether the clone is a full clone or linked clone.
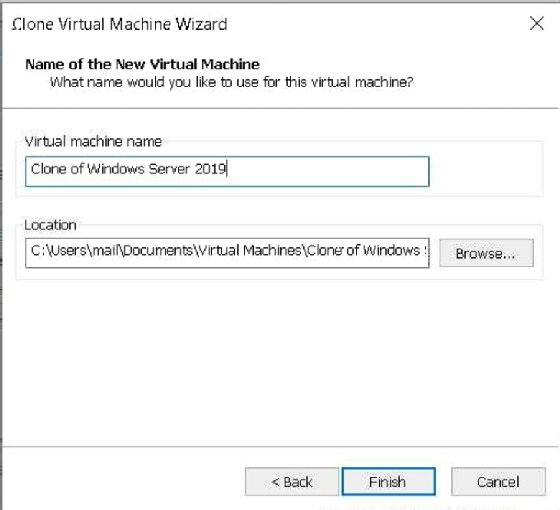
Then choose a destination folder for the clone to finish the VM cloning process.